Thursday, October 30, 2008

Pumpkin Penne Pasta

This Halloween I have not been feeling the costume vibe. Not sure why, but it's ok because all that creative energy has been driven toward pumpkins...yes, pumpkins. I've never made anything with pumpkin before and I want try a pumpkin recipe before the season ends. Unfortunately, the idea of making pumpkin bread or pumpkin pie seems like too much work to fit into my schedule, so I kept pushing the idea to the back of my mind. And then I came across a recipe that drew a raised eyebrow from Jon, but would definitely satisfy my pumpkin infatuation. Pasta with garlic, basil, and tomatoes is guaranteed to be good, but pasta with pumpkin? This was definitely going to be an adventure.

The recipe is one of Rachel Ray's recipes. I have never been a big fan of Rachel Ray. Her recipes usually don't appeal to me and I don't like her bright orange cookware (ironic since this post is all about pumpkins). But regardless, this recipe intrigued me and I found a rave review about the pasta from someone who feels the same way that I do about Rachel Ray. So, it was worth a shot.

I followed the recipe to a 'T' and was not impressed. I think it has potential, but it was too rich and too thick. I could envision it being so much better if the sauce was thinner and the pumpkin provided more of a subtle flavor instead of being so dominating. So, instead of posting the original recipe as written on Rachel Ray's website, I'm posting my own take on this recipe. I have yet to try these changes, so if you get to it before I do, let me know what other things we can do to make this recipe worth 5-stars.

Pumpkin Penne Pasta

1/2 lb penne pasta
2 Tbs butter
3/4 cup heavy cream
1/4 tsp pepper
1 cup pumpkin puree
1 cup reserved pasta water

1/2 cup parmesan cheese
1/4 cup chopped fresh parsely
salt and pepper to taste

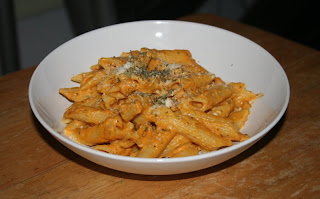
Boil the penne pasta in salted water until al dente. Drain, but reserve 1 cup of the pasta water for the sauce. Put pot on low-medium heat and add cream, butter, and 1/4 tsp pepper stirring occasionally until butter is melted. Add pumpkin puree and pasta water and thoroughly mix. Increase heat to medium-high and stir until sauce boils. Reduce heat to low and add parmesan. Once mixed in, taste sauce and add salt and pepper as needed. Once satisfied, turn off heat and add pasta to pot. Stir to coat. Add parsley. Stir to coat. Serve with a sprinkle of parmesan and parley on top.


Concluding Pumpkin Remarks

So, does this satisfy my pumpkin craving. Not remotely. I still have some pumpkin puree left and I think I'll try something a bit more traditional this weekend. :) ... stay tuned.

Monday, October 27, 2008

A Cake Only a Mother Could Love

Jon's mom recently asked me to make a flip-flop cake for her birthday (see pic). I got really into it and decided that I wanted to try another fun cake for the next occasion. That occasion happened to be Brian's b-day. Since he and Jon are both lego-fanatics, I decided to make a cake that looked like a bunch of lego blocks stuck together. To pull this off I was going to need fondant. In my past attempts with store-bought fondant, the cake came out looking great, but the fondant was disgusting. I found a recipe for marshmallow fondant online from Peggy's Baking Corner. Her website has a lot of information about cake decorating. It's also the site that I get my buttercream recipe from.


Here are the basic steps that I followed in the creation of the cake.

Just the Cake

I used a basic white cake recipe that I found on online. I actually thought it was too dry, so I'm not going to repeat the recipe here. Peggy's Baking Corner had a butter cake recipe that was so much better. I made two 9"x9" square cakes. Brian wanted strawberry in between the layers, so I put a layer of buttercream with some strawberry preserves. After stacking the layers I put a really thin layer of buttercream and let sit in the fridge for 20 min. This serves as the crumbcoat and prevents the crumbs of the cake from getting into the frosting. I then applied about 1/4" layer of buttercream on all sides and cooled in the fridge for about 30 min. This layer is necessary for the fondant to adhere to the cake.

Fondant Creations

The beauty of the fondant is that you can store it in the fridge for weeks as long as you wrap it with saran wrap AND store it in a ziploc bag with the air pushed out. I've read several websites that put a thin coat of crisco on the fondant in addition to the saran wrap to help maintain its moisture. I made mine about 5 days ahead and it was just fine. The marshmallow fondant was basically melted marshmallows with a lot of powdered sugar. It did taste much better than the store bought kind, but it was very sweet. If I were to do this again I would make my buttercream layer a little thinner. As it was, the fondant+buttercream combination was too sweet for me.

After coloring the fondant the classic red, yellow, green, and blue lego colors, I went to work creating the lego "bricks". Unfortunately, I didn't have a ruler, so my lego bricks were not very consistent. In addition, I should have made the fondant a little stiffer. They were pretty flimsy when I tried to apply them to the cake. To the right is the beginnings of my creation. After a while I realized that there was no way to get it perfect and just kind of gave up. Hence...only a cake a mother could love.


Once the cake had all the "bricks" in place, it was time to make it really look like a bunch of legos. The key to this was to add all the "bumps" that connect each lego together. Again, I was ill-prepared and didn't have anything to make uniform bumps. I ended up taking bits of the fondant, rolling them into little balls, and then pushing them with my finger to make little mini cylinders. I estimated that I must have made about 250 of these "bumps". However, in the end I took a poll and everyone could figure out what it was...success! If I were to make again, I would definitely try to get more of a professional quality rather than a homemade quality.


Thursday, October 23, 2008

Early Thanksgiving w/ Mash Potatoes and Green Beans

In an effort to try something other than beef and chicken for dinner, I decided to buy a turkey for tonight's dinner. I was hoping for a little small turkey, but I completely forgot about the Thanksgiving holiday and the enormous 16 lb turkeys that go with it! That's a little too much for only 2 people. Then I found a Turkey London Broil. (I had no idea they had london broils in anything but beef). If you've never seen a Turkey London Broil, imagine a giant chicken breast. So, I bought it and when I got home I stopped and realized that I had no idea how to cook a london broil. I had originally planned on roasting it, but that wouldn't quite work. After doing a little research, I came up with my own recipe using some of my favorite ingredients: garlic, red wine, and onions.

Result: The turkey broil was great! The meat was juicy and flavorful and no bones to deal with.

Turkey with Mashed Red Potatoes and Fresh Green Beans

Turkey Marinade:
wine
garlic powder
onion powder
pepper and salt

I didn't measure anything. Just put all the ingredients into a plastic bag with the turkey london broil and marinaded for about 30 minutes in the fridge. While marinating, get the potatoes and green beans started. Pre-heat oven to 425 degrees. Put the london broil and marinade in a roasting pan and cover with tin foil. Cook in the oven for about 30 minutes or until no longer pink in the middle. After cooked, let sit for 5 minutes and then slice for serving.

Mashed Red Potatoes
While the turkey marinates, wash and cut 4-5 small red potatoes into approximately one inch squares. Put in a pot of boiling water (with salt) on the stove. Move onto the green beans while potatoes boil. Once green beans are simmering, check potatoes with a fork to make sure they are mashable. Drain water from the pot. I often use a plate for this to save dishes (ahem...small kitchen, remember). I place the bottom of the plate toward the inside of the pot, hold the center of the plate in place with my hand and slowly tip the pan with my other hand. Be careful not to let the steam or water burn your hand. Once drained, add 1 Tbsp of butter and start smashing! I find that smashing the potatoes before you add milk really helps achieve a smooth consistency for the potatoes. Once mashed, add milk and keep smashing until it's as thick or thin as you like your potatoes. Add another Tbsp of butter and some salt to taste.

Fresh Green Beans
I stopped by the Reading Terminal Market on my way home from work earlier this week and did all my veggie shopping. Nothing beats fresh local vegetables. The green beans looked amazing, so I decided to get a bunch and work them into one of my dinners. The recipe below is from my mom. I have no idea if she got it from somewhere else. This is by far my favorite way to eat green beans...thanks mom!

2 Tbsp butter
1 small onion (chopped)
2 Vegetable bouillon cubes
2 cups water

Wash the green beans and snap off the ends. In a saute pan on medium high heat melt the butter. Once melted add onions and saute until soft and translucent. Add green beans and saute until the color becomes that wonderful bright green color (about 5 min). Add 2 cups water to the saute pan. Once the water begins to boil, break up the bouillon cubes and add to the pan. Stir around to dissolve the bouillon cube. Reduce the heat to simmer and cover the pan. Check and stir the beans every 10 minutes or so. I like me beans a little soft, but by no means mushy. Take a bite after 20 minutes to see if they are to your liking. The beauty of this dish is that the broth serves as the "gravy" for the turkey and mashed potatoes.

Jonny's Corner
Seconds? Yes
Response: Horrible! (In reference to the base running of the Phillies game). What? Oh, good meal.

Welcome to My Kitchen

Welcome to my new blog! This blog is all about my very, very, very small kitchen and all the different and new dishes that I can churn out of it. I hope you enjoy your time here and hopefully get a few ideas for what to cook for dinner tonight.